• Skip to main content
  • Skip to footer

The BizPal Company

All Things Web

  • Home
  • What We Offer
    • Starter Website Design and Build Service
    • Website Store
    • DIY Website Builder
    • Domains and Hosting
    • Websites and Marketing Services
  • Blog
  • About Us
    • Events
    • Testimonials
    • Press
    • Contact Us
  • Log In
Home » WordPress » WordPress: How to Work with Post and Page Formats

WordPress: How to Work with Post and Page Formats

November 23, 2015 By Becky Bruso

  • Is Your Website Name Available? Search Right Now!

    Domain Search

How to Work with Posts and Pages

Written by Becky Bruso

Computer imagecrop_WordPressIn this post we will explore how to work with posts and pages within WordPress.  The great thing is that once you learn how to get around in posts, you can apply the same concepts to a working with pages. This article will detail how to add and work with posts and pages with written instructions including images of the how-to process in action. This is a rather lengthy article, but it is the heart of where you will produce your WordPress website content.    I have also added a short desktop video which demonstrates exactly how to work with posts and pages. We will be talking about layout options as they apply to the overall look and feel of the post and will not discuss the fine details of formatting the text within the post.  This article includes audio instructions as well. I wrote and recorded both methods to provide you with the ability to pick which method is best for you to see how to work with posts and pages.  Once you have mastered working with posts, you can rest assured that you have will also be able to work with pages.  There is only one difference between posts and pages and this is the ability to categorize and tag.  Pages in WordPress do not automatically come with the ability to be categorized or tagged.   This difference between categories and tags will be touched upon later in this article. 

Video Demonstration of Working with Posts and Pages

Written Instructions on How to Work with Posts and Pages

How to Add a New Post or Page

To add a new post, go to your WordPress dashboard.  Click on Posts, then select Add New.  The Editing dashboard allows you to enter a title for your post.  The title is displayed within your post in a bigger and bolder font than that of the body of your text.  The font and its size are decided by the theme you have used for your WordPress website.  Overriding the size of the post title is a CSS customization and won’t be discussed in this article.    
WordPress Add Post Title |Page Title
Adding a Title to a WordPress Post or Page
  The wording chosen for your post or page should be headline worthy and related specifically to the topic you are writing about.    To optimize the wording for search engines, you might consider downloading a plugin like Yoast, which will show you how your page is scoring with respect to Search Engine Optimization or SEO.  The Yoast website also provides an in-depth tutorial on SEO.    

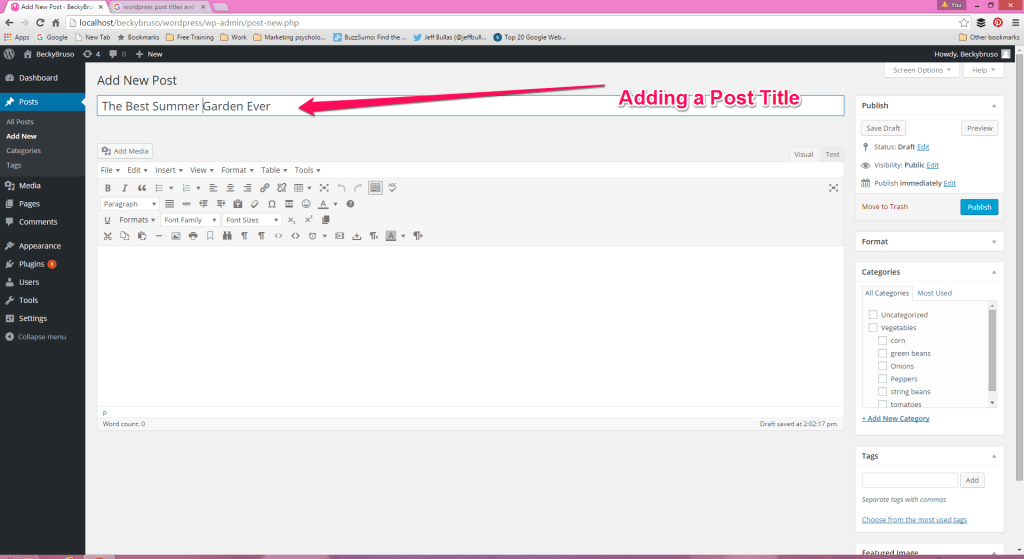
Adding Media (Images, Audio, and Video) Posts and Pages 

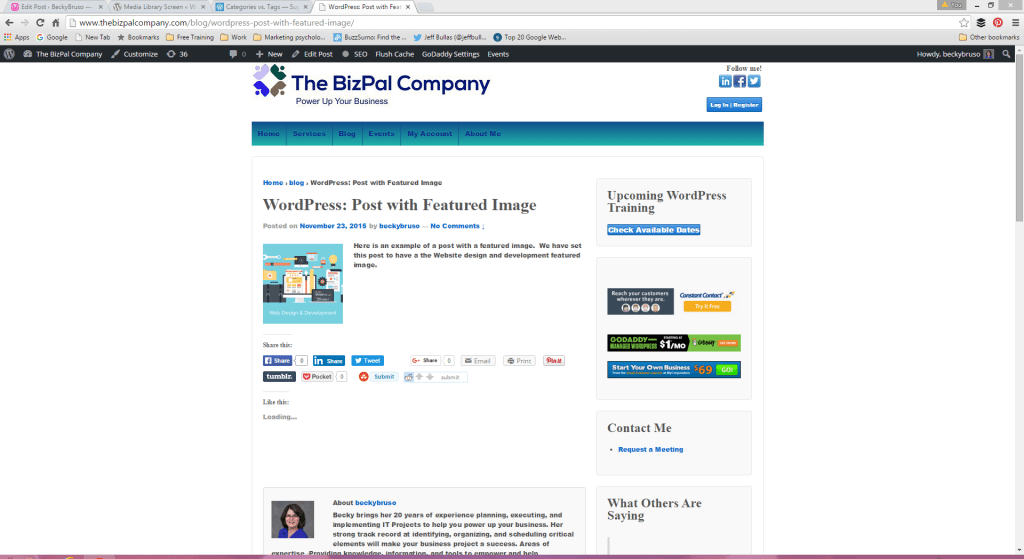
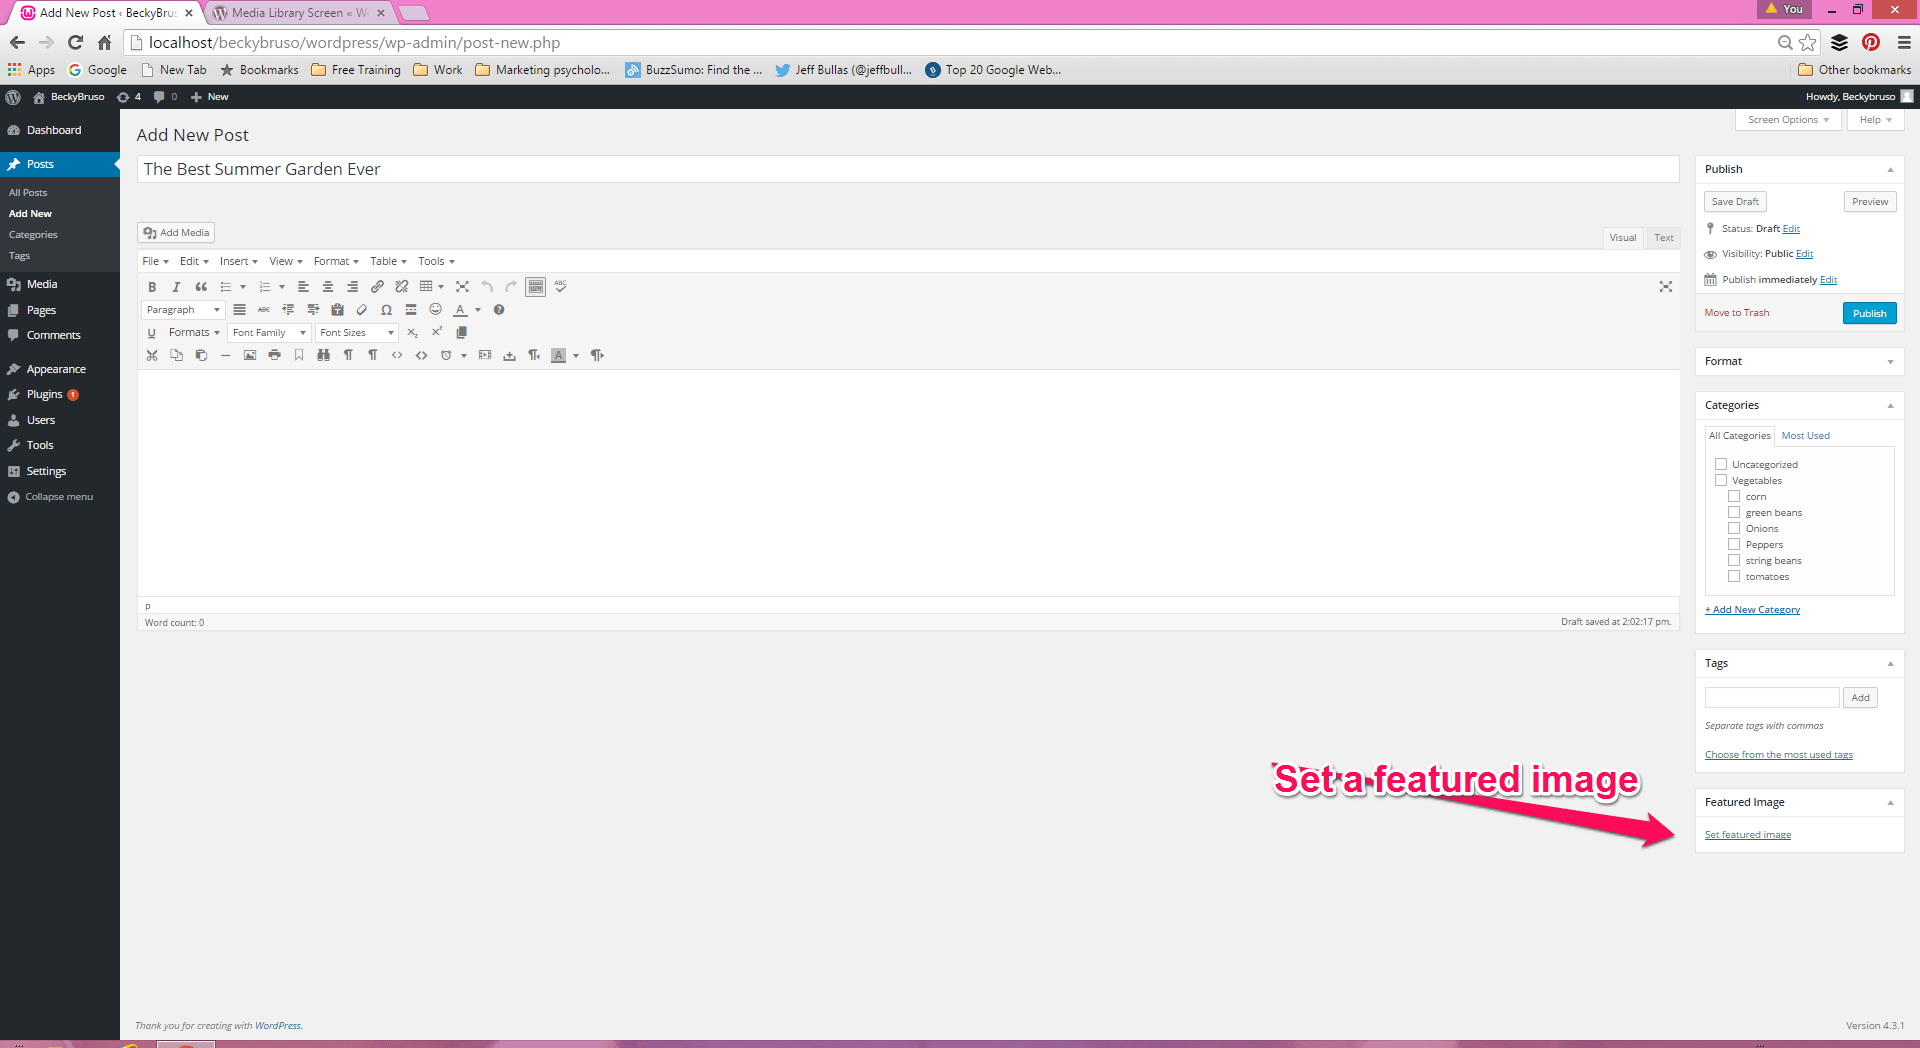
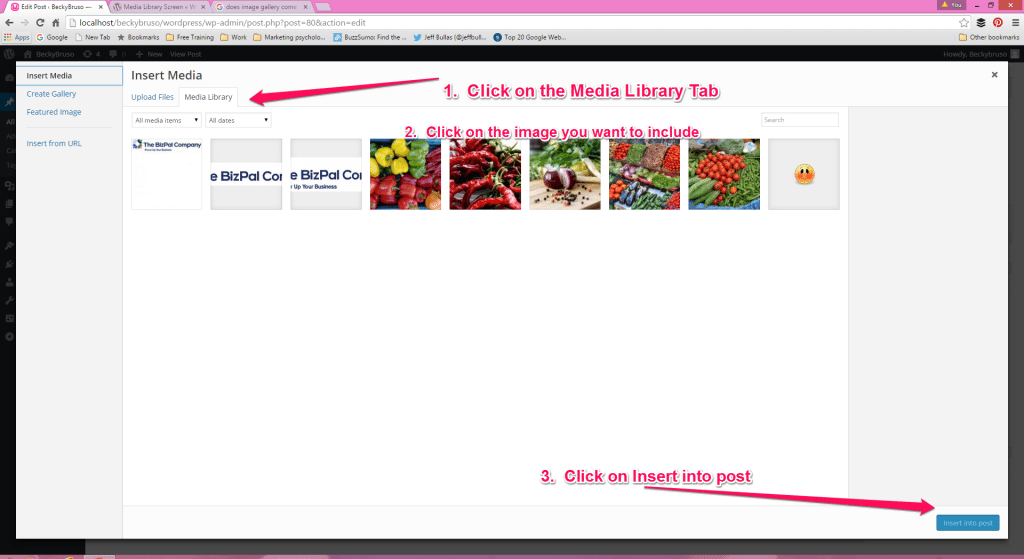
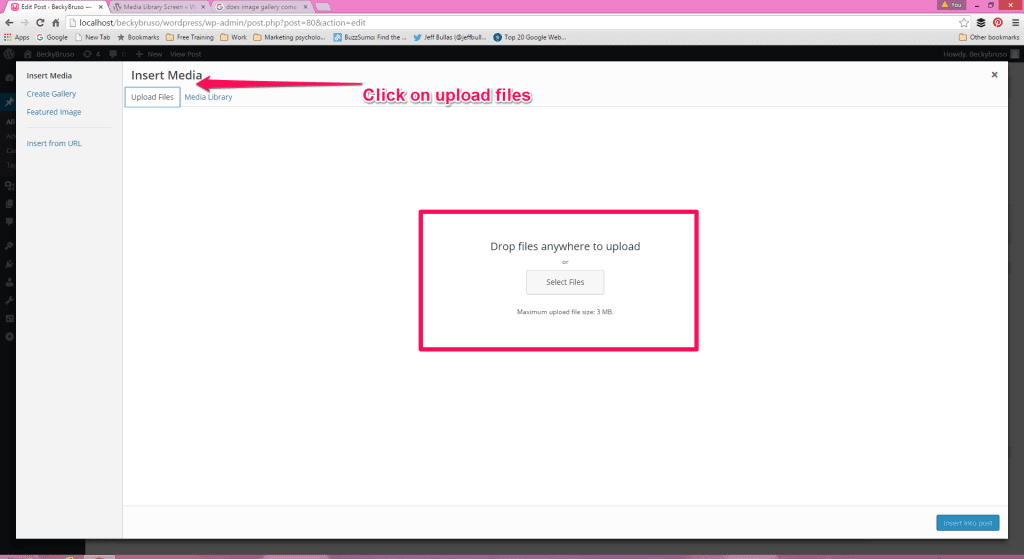
Every post has the opportunity for you to add media.  Media can be described as images, and audio or video.  You may set a featured image by locating the set featured image panel option and selecting the desired image.  The media library and upload to the media library will be shown in detail within this article.     The placement of the featured image varies by theme.  Below is an image of what the Twenty Thirteen Theme’s featured image looks like on the front end.  
WordPress Featured Image Twenty Thirteen
View of Twenty Thirteen Theme Featured Image Post
To show that this is theme specific, take a look at the positioning of a featured image for a custom theme.  Here you will note that the featured image is left justified versus the center justification of the previous featured image.  This is to show that this positioning of the featured image varies by theme.   Featured images are limited in whether then can be placed left, center, or right as well as being limited to the size that they can be shown as.  There is another method of adding images which gives you more control over how you can display the image within your posts and pages.  We will look at the other way to add one or more images to your posts and pages next.  
WordPress Featured Image Variation
Featured Image Set Custom Theme
 
WordPress Setting Featured Image
Setting Featured Image for WordPress Post |Page
There is only one featured image per post, but you may add any additional media you would like to support the discussion of your post.  Adding audio and video may not have some of the advanced features discussed next due to their type of media.  For example, audio may not have a size option as do image media types.    When adding other media to your post besides the featured image, you are given the opportunity to position in at the left, center, or right of your text.  Adding media this way gives you more flexible placement of your images.  In addition, you can select the size you would like your images to be displayed.   To add media, click on the Add Media Button, as shown below.  All media types may be added by using this button.
WordPress Add Media Button
How to Add Media to a Post | Page in WordPress
The theme in use for this demonstration is Twenty Thirteen.  This particular theme does have the gallery feature enabled. Galleries are a topic for another post.   We will be talking about setting up non-gallery style images within this post.  You will note that you have the option to either upload an image from your computer or select one from the library of images which you already have.   First we will work with an image already in your media library.  To do this, you will click on the media library Tab.  You will see the images in your library you have previously uploaded.  Click on the image you wish to include.  Then click on the blue Insert into post button.  
WordPress Add Media From Library
Adding Media from the WordPress Media Library
  To upload a media file from your computer, click on the upload files tab.  You will notice that there is now a select files button.  Click on this button and locate the media you wish you upload from your computer.  This option works just like your typcial file locate, select, and upload features.   Once the desired media has been uploaded, select insert into post.  
WordPress Add Media from Upload
Adding Media to WordPress via Media Upload

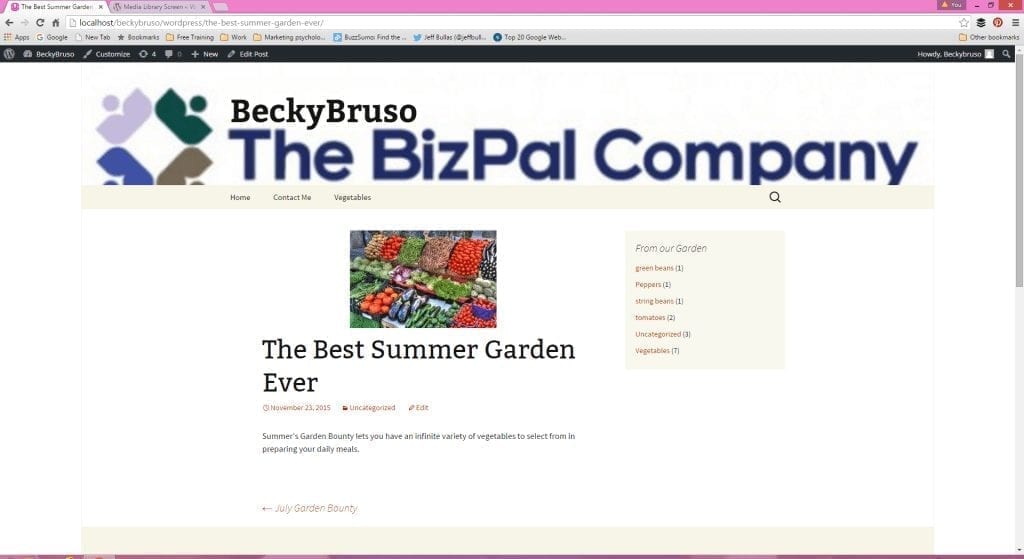
Positioning Media within Your Post

Now that you have added the media to your post, we will work with sizing it and positioning it to your liking.   Visually you should be able to see the image within the editing area of your post.  Click on the image you just added and you will note that you have enabled the media positioning and editing features.  In the visual below, no justification has been selected and you will see the editing options displaying just over the image in the post.    
WordPress Image Editing Options
Media Positioning Options in Post | Page
Each justification image corresponds with left, center, right, and none.  The next item in the editing bar is the pencil which is what you would click on to either change the selected image or change the size of the image.   Mouse over each of these to display your choices.  The right most “x” would be used to remove the image entirely from the post.  Click on the pencil icon to explore other image options.  Here we will add the following:
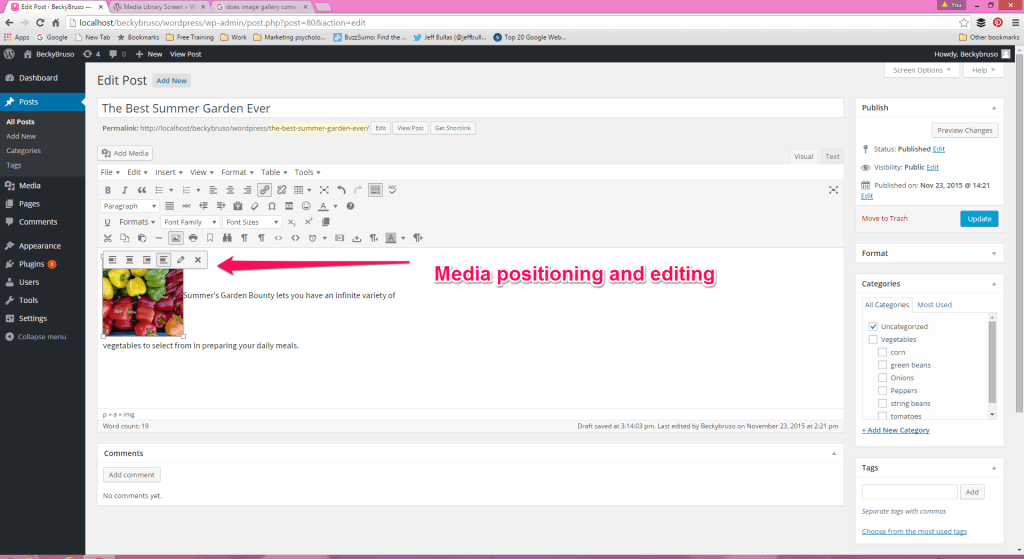
  • Caption (if desired)
  • Alternative Text
  • Alignment Changes
  • Size
  • Link to Selection
Your choice to add captions is entirely optional and up to you.  Captions will display under the picture and in the font which is determined by your theme.  Alternative text will not display, but rather is meant for SEO and to be used by screen readers.   Alignment changes can be accomplished here or within the post as described earlier.  Experiment with clicking on each alignment choice and notice how the text positioning also varies based upon your selection.  

Sizing Media within Your Post

The size of the image within your post can be selected next.  When images are uploaded to your website, they are automatically created in three sizes.  These are the sizes which are specified under the dashboard option Settings, Media.  You will be able to select the image size you want to feature within your post or page.  Some themes may restrict the sizes you can select from, but there is also the ability to set a custom image size if the sizes presented to you do not meet your needs and you wish to show your images in a larger or a size in between that which is shown in the drop down list box for size.  
WordPress Image Detals Options
Advanced Media Options in WordPress

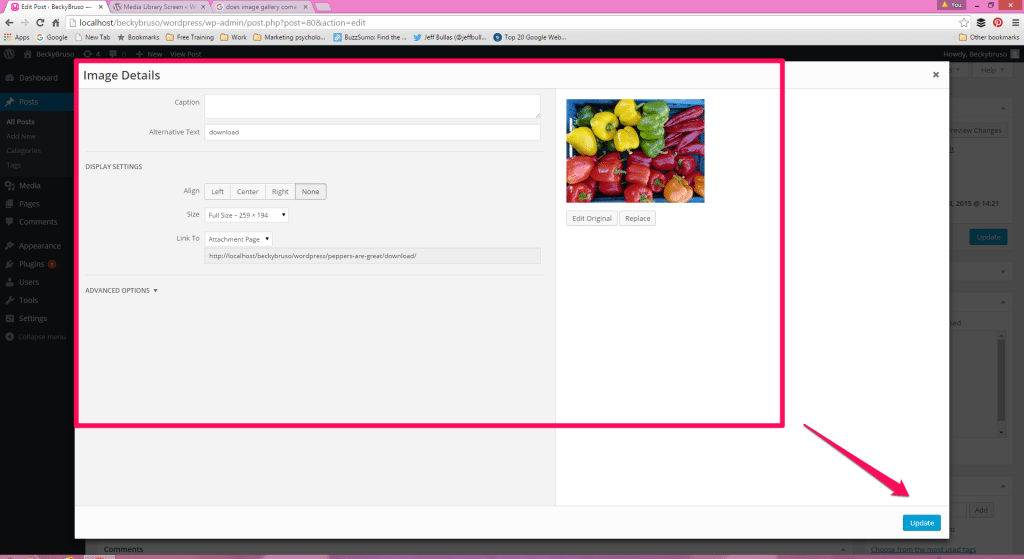
Link To Media Options

You may link to the media file itself, an attachment page, custom URL, or none.  Typically, I would select none unless the website you are working with is more image centric.  In this case you might explore the other image options.  We will look at all these image options as well as the advance options in a future posting series.   Once you have made your final selections, click on the blue Update button.   The next screen image will show you what the choice of both the featured image and the addition of the extra image to your post will look like.  Again, this view is based upon the Twenty Thirteen Theme.
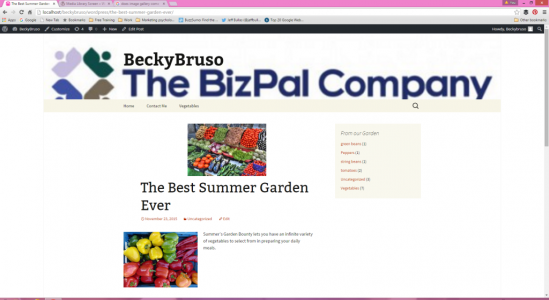
WordPress View with Featured and additional image
Website View of WordPress Post with both featured and additional image

Publish Options

By default, the publish options for your posts has been set to a status of published and visibility of public once you hit the publish button.  Prior to this, it is set as Draft and visibility pubic.  The publishing options may be found to the right of the editing area unless you have selected a one column view of the editing dashboard.  In this case, the various options will be stacked upon one on top of the other.  
WordPress Visibility Options
Changing Post | Page Visibility Options in WordPress
It might be wise to change the visibility of your posts to private while you are in editing mode so that it will not be unveiled publicly until you have completed your work with it.  To do this, click on the Edit link next to Visibility:  Public.  You may change it to private by selecting the radio button next to private.  In some cases, where you have content you want to restrict to a specific audience you may want to password protect it.  If you opt to select  privately published by clicking on the radio button next to privately published, you will be prompted to enter your selected password for this post. You will note that under the public visibility option, you have the ability to set the post as the front page post.  You might want to do this if you have a specific message  you always want to feature at the top of your posts.  This can be changed should you later desire to feature a different post or not to feature any post at all as the first post.   The ability to feature is a post as stuck to the front page is  a post type feature only and is not applicable to pages. The WordPress publicize date options were covered in this related post:  how to schedule your writing for a future publication date.  Setting future publication dates frees you up to do other things without worrying about going in and manually updating a post or page every time you want to publish. 

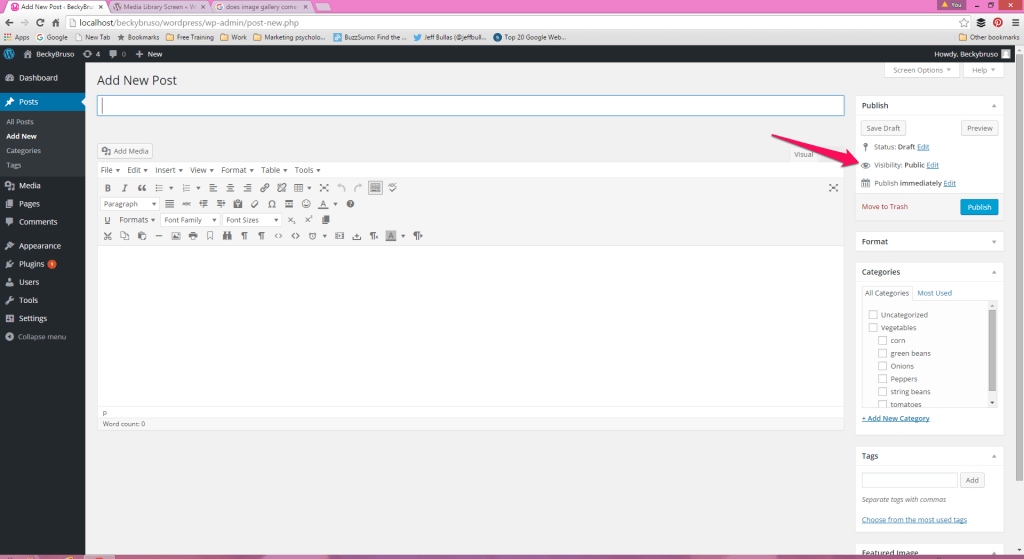
Format or Layout Options

Based upon your theme, you will get the ability to select your post format or post layout.  Basic WordPress formats typically include standard, aside, audio, chat, gallery ( if theme allows), image, link, quote, status, or video.  Keep in mind that all of these formats may or may not be available in your theme.  In which case you would likely see the term Layout as an option instead of format in one of the side panel options. In the theme layout options image below, the installed theme allows for the following layouts:   default, content/sidebar,  sidebar/content, content/sidebar half page, sidebar half page/content, and full-page width no sidebar.  These various options allow you to tailor your posts individually and feature them in the best format for that specific post.   Read a more detailed description about the basic post formats in WordPress.   All of these may not be available within your theme, but some basic variation of these options will be available.  Try the various formats or layouts which are available to you to see which one works best for the specific article, post, or feature you are working with.  
WordPress Theme limited formats
WordPress Theme Replacement of Post Formats with Layout Options

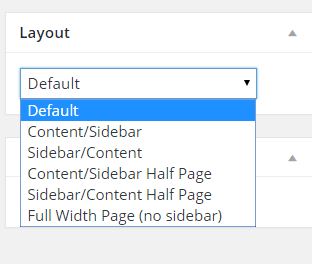
Category Options (Posts only)

Categorizing your posts is a great way to give your website visitors different paths into viewing the content you publish.  Categories can be used to create menus, and sidebar navigation.   You select a category for your post by expanding the categories panel.  You may also add a new category from within your post.  Take a look at a related in-depth post which discusses How to maximize WordPress categories.

Tag Options (Posts only)

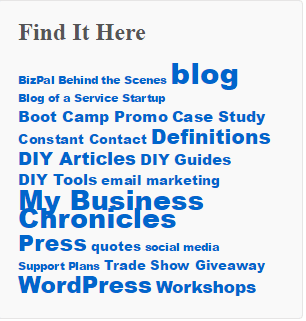
Tags provide you with an alternative way to add additional classification information to your posts.  Tags may be used to create a sidebar widget for navigation into your content by its specific tag.  If you look at the sidebar of this website, you will see that WordPress is a tag I have used extensively throughout.  The great thing about tag clouds is that they will grow the size of the tag in your tag cloud as the you add more content for that specific tag.  You might be wondering why you would want tags in addition to categories.  Tags are used when you want to describe your post in more details.   Below is a sample of a tag cloud from The BizPal Company which is clickable by website visitors to allow them a path  into the content  tagged with that specific label.
WordPress Tag Cloud
Tag and Category Cloud Example on WordPress Widget Sidebar
  There is no limit to the number of tags you can add to a post.    In my example, I might also refine my WordPress tagged posts by further classifying them as posts, pages, and more.  The classic example used by WordPress is with a recipe post.  Suppose you have a brownie recipe and it is found in categories of both baking and deserts.  You might want also to tag it with walnuts, chocolate, and brownies.  This would allow website visitors who are looking for both chocolate and baking in general to better find information offered on both.   

Changing or Editing an Existing Post or Page

To edit or change a post which you have already created and perhaps published, go to the dashboard and locate All Posts.   The beauty of this feature is that it operates exactly the same way for WordPress pages.  Thus, if working on scheduling pages, click on Pages, then select Add New (if you are adding a new page) or All Pages ( if you are working with an existing page).   The Publish panel section looks exactly the same on posts as it does on page with the exception of being able to add categories and tags to pages.  You can only add categories and tags to posts, not pages.  Once you have done your desired changes, you would click on the Update button to the far right of the post or page if you have a 2 column view or stacked up down under the editing area, if you have a 1 column view selected.  You might recall the ability to have a 1 column or 2 column editing panel is enabled and disabled up on the right hand side of your screen under screen options.    

What can go Wrong with Adding and Editng Posts and Pages ?

When editing a post or a page, you may not see the options I described above.  In this case, the difference can be based upon  a couple of factors.  You might have your screen options set differently.  If you locate the screen options in the upper right hand corner of your post or page editing dashboard and click on this; you might find that tags and/or layouts/featured images may not be checked.  In this case, you would not see the editing panels to your right or stacked up below the editing areas.  To enable these and allow for viewing while editing, simple check in the box next to the feature you wish to enable.  Keep in mind that you will not find categories or tags as a screen option on pages, unless  there has been a custom plugin installed for this purpose.   In some cases, these options might differ based upon the theme you have activated.   Once such difference, as noted earlier, is the panel being shown as layouts versus formats for posts.  

Search This Website

Quick Links

Footer

Buy now with PayPal

We Accept PayPal for All Website Products and Services


Location

30 Lyons Street

Southbridge, MA 01550

In Person Or Virtual Meetings Available by Appointment Only
Mailing Address

PO Box 146

Southbridge, MA 01550


Join BizPal Email List

Connect with Us

  • Email
  • Facebook
  • LinkedIn
  • YouTube

Search This Site

Constant Contact Solution Provider

  • Blog
  • Privacy Policy
  • Sitemap
  • Website Store
  • FAQs

Copyright © 2023 · The BizPal Company